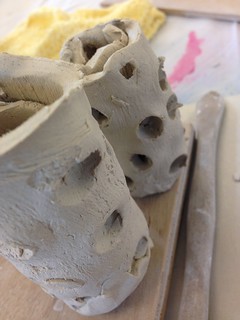
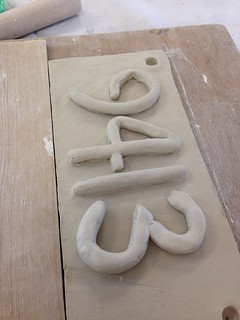
This week we worked with clay slabs. Maya loses interest rather quickly when she takes a class and she won't work on making things for longer than an hour (the class is an hour and a half).
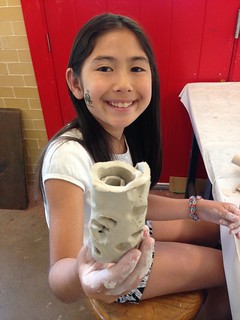
She was fooling around with her slab and created a really cool objet d'art, so I asked her to make a modified one to see if we could get a candlestick in it:
I worked on a house number sign for our house:
Showing posts with label class. Show all posts
5.16.2015
5.09.2015
clay class at Glen Echo Park
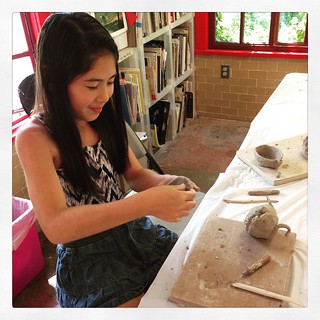
Maya and I are taking a parent-child clay class at Glen Echo Park with our next door neighbors. This week, we learned how to make pinch pots. Maya used the technique of using two pinch pots joined together to create a 3D cat.
Location:
Glen Echo, MD, USA
10.24.2009
pride of craftsmanship
On my list of "33 Things to Do While I'm 33" are things like travel (check!), get an iPhone (check!), and learn a new language (not so check). And I'm now on my way to checking "take a creative class" off the list.
My sister D and I are taking a 10-week letterpress class at Otis. Like many paper fiends we both love letterpressed items and we were curious about how it works. So we nudged each other into taking this (expensive) class.
Who knew letterpress would be so much work? OK, who am I kidding, of course it's a lot of work! No wonder letterpress stationery costs so much. (And it's very greasy (which actually was a surprise).) Most modern mass-produced letterpress stationery is made using photopolymer plates, which easily allows use of images, patterns, and text. But we're starting off old-school with metal type.

I set the phrase "i (heart) the liberry" because one of my first graders would literally run around the library yelling this. I liked it ... but no body seemed to "get" it so I reset it as regular ol' "i (heart) the library". My idea was to print it in black except use red for "love," which means you pull out the "love" letters and print a batch in black, swap out the letters, and print just "love" in red.
Unfortunately, it's not that easy when it takes two-and-a-half hours just to set and adjust the type and machine. So all I got done was this:

Sure, the phrase isn't complete, but I wish you could feel the lovely impression of the letterpress. I'm pretty happy and proud of the results. It drove me and the teacher crazy trying to get everything just right (he basically told me he hated this project!). But it was well worth the hassle. Truly, it gave me the joy of creating something with my own hands.

My sister D and I are taking a 10-week letterpress class at Otis. Like many paper fiends we both love letterpressed items and we were curious about how it works. So we nudged each other into taking this (expensive) class.
Who knew letterpress would be so much work? OK, who am I kidding, of course it's a lot of work! No wonder letterpress stationery costs so much. (And it's very greasy (which actually was a surprise).) Most modern mass-produced letterpress stationery is made using photopolymer plates, which easily allows use of images, patterns, and text. But we're starting off old-school with metal type.

I set the phrase "i (heart) the liberry" because one of my first graders would literally run around the library yelling this. I liked it ... but no body seemed to "get" it so I reset it as regular ol' "i (heart) the library". My idea was to print it in black except use red for "love," which means you pull out the "love" letters and print a batch in black, swap out the letters, and print just "love" in red.
Unfortunately, it's not that easy when it takes two-and-a-half hours just to set and adjust the type and machine. So all I got done was this:

[This sample is on smooth, slightly shimmery paper. The ink "sticks" pretty well to this paper.]
Sure, the phrase isn't complete, but I wish you could feel the lovely impression of the letterpress. I'm pretty happy and proud of the results. It drove me and the teacher crazy trying to get everything just right (he basically told me he hated this project!). But it was well worth the hassle. Truly, it gave me the joy of creating something with my own hands.

[I printed more on watercolor paper, which my teacher didn't think took the ink very well, but it has a nice texture to it. Besides, I bought a whole pad of the stuff so I need to use it up. My idea is to cut them up into business card size and fill in the blank depending on my mood.]
1.19.2008
xmas mini-album sneak peak
i'll be teaching a christmas mini-album class in the very near future. time + place tba. click on the mosaic to see bigger sample pictures.


this is a 6x6 mini-album with a transparency cover. students need to bring 6~10 christmas or winter-themed photos, family holiday card(s), and any embellishments or ephemera (such as ribbon or gift tags from gifts, ski lift passes or business cards from a trip). i will provide all other materials.
no worries if you've never scrapbooked before. the class is geared towards all levels of scrapbookers :: the design is simple + easy enough for beginners, and more advanced scrappers can add embellishments and details to suit their individual style.
the class fee is $15, and it should last about two hours. i intend to teach this class at least twice, once at my house and another time at a friend's house. if you know you're interested, please leave a comment here (or email me) and let me know general times + days that work for you (i.e., weekend days, friday nights, etc.) so i can schedule classes in the next month or so.
here's a variation on the album ::
Labels:
2008,
class,
crafting,
scrapbooking,
scrapbooking about 2006
Subscribe to:
Posts (Atom)