8.18.2012

What I Made for Dinner :: Bierocks

I feel like cabbage gets a bad rap sometimes. Don't you think it has a reputation as an ingredient for "peasant food" or it's only used as filler? (Not to mention, it gives you gas!) I have no evidence to support this, but I feel like cabbage is not on the Favorite Veggies list in this country because, like its relative the Brussels sprout, it was often overcooked.

"mama Kawamoto" is my mom!
[Pickled Veggies by Mama Kawamoto is my mom's pickled cabbage.]
Clearly, though, it's a staple in many food cultures and it can be a versatile ingredient. Thinking back to my childhood, my mom used it in lots of foods: Okonomiyaki (Japanese), stuffed cabbage rolls (Europe and the Middle East), corned beef (every St. Patrick's Day), tsukemono (Japanese pickles), hoi kou rou (Chinese stir fry), etc.

And cabbage can be pretty good for you: 1 cup of cabbage has 19 calories and 2 grams of fiber. According to the SELF Nutrition Data website, it's "very low in Saturated Fat and Cholesterol. It is also a good source of Protein, Thiamin, Calcium, Phosphorus and Copper, and a very good source of Dietary Fiber, Vitamin A, Vitamin C, Vitamin K, Vitamin B6, Folate, Magnesium, Potassium and Manganese." Added bonus? It's pretty cheap.

I'm not sure why I haven't cooked with it much even though I'm accustomed to eating it in various ways and my kids like it. Leave it to Pinterest for inspiring me to try a new cabbage recipe. The picture below is the original Pin I found, and I guess the timing was right because I was in the mood for doughy pockets filled with meat and cabbage.

After a bit more research (you all do know that when I say "research" I actually mean "surf the web," right?), I adapted recipes from Mrs. and Mr. Bear's Kitchen and Fork Fingers Chopsticks.

INGREDIENTS:
  • 1 package puff pastry (dang, that stuff is hard to work with!)
  • 1/2 head of cabbage, thinly sliced
  • 1 onion chopped
  • 4 cloves garlic minced
  • salt and pepper
  • melted butter
DIRECTIONS:

IMG_3615
Chop the onions and garlic (it's hidden under there somewhere) and thinly slice the cabbage.


IMG_3616
Cook the ground beef in some olive oil until it starts to crumble. Add the cabbage, onion, and garlic and sautee until the vegetables start to wilt. (Thank goodness for the new 6-quart pot my mother-in-law got me for my birthday!)
IMG_3617
It cooks down to almost half pretty quickly. Salt and pepper generously.

IMG_3618
Take the meat-cabbage mixture off the stove and let it cool a bit while you work with the puff pastry. (That's my little workhorse of a desk fan; I've had it for years, at least 20, I'd say.)

Pre-heat the oven to 375 degrees.

I used frozen puff pastry dough and you must, must, must follow the directions on the box carefully. If it says to let it defrost on the counter for 40 minutes, it means only 40 minutes, not a minute longer! Seriously, I left it out not much longer than 40 minutes and it was way too defrosted; the layers of pastry wouldn't unfold properly and I had to refrigerate it again. Also, while you're working with the first sheet of pastry, leave the second sheet in the fridge so it stays cold. Otherwise it's impossible to work with.

Cut and roll the puff pastry into squares (I want to say mine were at least 6"x6" but I don't remember exactly) and fill each with the meat-cabbage mixture. (I had tons of filling left over so you may want to use another box of puff pastry and freeze any leftover Bierocks for another day.) Fold over the corners and seal the pocket tightly. Mine came out all differently shaped and sized ... sometimes I'm not one for the details.

IMG_3621
Did I actually use a kid-size rolling pin? Why, yes, yes I did.

IMG_3622
Butter makes lots of things better, don't you think? You can use an egg wash if you prefer, but I went all out and used butter.

Bake the Bierocks in the oven for 20 minutes or until the puff pastry is golden. Serve hot!
IMG_3624

IMG_3623
Puff pastry is puffy!

8.16.2012

I'm just one in a long line of Japanese female bloggers

I love that Maria Popova of Brain Pickings calls Sei Shōnagon the world's first blogger. It turns out, through this blog, I'm carrying on a cultural tradition! ;)

[Sei Shōnagon (清少納言 born c. 966 ~ died c. 1025) was a Japanese diarist/author/poet/court lady who is most famous for writing Makura no Sōshi (枕草子 The Pillow Book), which was completed in 1002 and translated into English in 1889.]

Product rant

Normally I wouldn't do this, but I'm kinda annoyed so I just have to vent a bit ...

My mom bought the kids beach towels for the summer and, because she's my mom, she bought them on sale on top of a sale (i.e., pretty cheap). They're Martha Stewart brand from Macy's, similar to these towels, except they have a mermaid on it instead of anchors (not surprisingly, Ian didn't want to use it after he found out about the mermaid):


I liked them initially because they're big and bright, and at $40 a pop they should be pretty good, right? It was all fine and dandy until I washed them. During the summer I line dry my clothes so I got a good look at each piece of laundry as I hung it up to dry; a lot of it was covered in brightly colored lint. Well, I thought to myself, it was the first time washing the towels; it's not too unusual that there's lint. The annoying thing is that when you line dry -- as opposed to using the dryer -- there's no easy way to get lint off of damp clothing (short of picking it off with your fingers). I wasn't mad or anything. We just had to suck it up and wear clothes with a little bit of lint on it. (Please, no comments about using a lint roller -- I'm not that diligent about laundry. And, shame on you! My regular readers should know that about me by now.)

Fast forward to this morning and I've now washed the towels at least three times and there's still lint on everything I wash in the same load. It was bad enough that I had to dry a few pieces of dark clothing in the dryer so the lint would come off easier. (I hate having to use the dryer when I don't have to.) The back of the towels also look like they're balding in narrow strips.

And just so you know, I followed the washing directions pretty closely; the only thing I've done differently is wash in cold water instead of warm. I even dried one of the towels in the dryer (no fabric softener) and it hasn't changed anything.

[Speaking of washing directions, the tag also read "Avoid contact with skin treatment products," but the sentence is written on two lines so it initially looked like "Avoid contact with skin," which made me think ????? And even after figuring out the whole sentence I was a little weirded out because I'm assuming sun block can be considered a skin treatment product. So, are they encouraging you not to use sun block at the beach/pool if you're using your Martha Stewart beach towel? That doesn't make sense!]

Anyway, I'm annoyed enough with the lint situation that I'm considering trying to return them to Macy's. Sure, my mom paid $8 each for them instead of $40, but it's enough of a nuisance that it's almost not worth the monetary savings. What would you do?

8.14.2012

Embroidery floss tip

Like many people of my generation, I made friendship bracelets as a youngster. I even dabbled in actual embroidery at one point. As a result, I amassed a collection of embroidery floss over the years and the jumbled mess has been transferred from one container to another. Maya was intrigued when she peeked into my most recent tin of colorful thread, and I thought it was about time to start using the floss again.

Maya and I have been on a friendship bracelet-making kick this summer and we've been adding to our embroidery floss collection. To avoid working with a mess of tangled, mixed-up floss, I bought some embroidery floss bobbins and gave myself the task of untangling the old floss and winding them onto the bobbins. It was kind of a pain. Luckily -- or so I thought at the time -- I had some floss that were still wound up as skeins. Surely it would be easier to wind that thread onto the bobbins. Not necessarily. As I unwound the skein, the thread would get caught up in itself and make random knots or end up looking like Mr. Messy from the Mr. Men series:
 

I was frustrated and, short of recruiting the kids' arms to act like a yarn swift, I was on my own. I don't know what took me so long, but I finally figured out a way to easily unwind a skein.

How to unwind embroidery floss skeins without tangling the string

First, gather your supplies: embroidery floss, embroidery floss bobbins, and a cylindrical object with a diameter of 3.75 inches (I used a drinking glass); Sharpie, scissors, and tape are optional.

How to wind embroidery floss skeins on to floss bobbins without tangling the string

Next, remove the paper wrapper from the skein and carefully open it up (i.e., separate the strands) so that the floss makes a loop. Sometimes you'll have to pull a strand from one side to the other to open up the loop. The optional materials can be used to write the number of the floss on the bobbin and to cut a small piece of the string and tape it to the bobbin.

How to wind embroidery floss skeins on to floss bobbins without tangling the string

Take something cylindrical that has a diameter of about 3.75 inches. I used an inverted heavy-ish drinking glass with a lip because the plastic cup I used first was too light and the floss would slip under the rim of the cup. Place the loop of floss around your cylinder with the cut end of the floss on top. The loop of floss should spin around your cylinder (without getting tangled up!) as you wind the floss around your bobbin. Occasionally, the floss will tighten up around the cylinder. When that happens, manually unwind a few rotations-worth of the floss from around the cylinder and continue to wind your bobbin.

a rainbow of embroidery floss

Once you're done with all of the skeins, you'll have a beautiful rainbow of embroidery floss!

good enough is a participant in the Amazon Services LLC Associates Program, an affiliate advertising program designed to provide a means for sites to earn advertising fees by advertising and linking to Amazon.com.

What I Made for Dinner :: Fried Rice

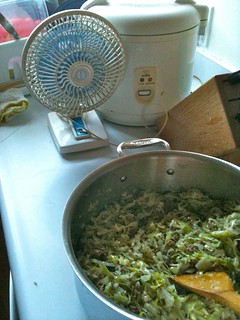
When we got married eons ago (okay, it was 12 years ago, not eons) a friend of mine gave us a Japanese rice cooker as a wedding gift. It's a great rice cooker, except that it's huge (it makes 10 cups of rice). Now, if you have an automatic rice cooker, yours might be like mine and have little lines on the inside so you know how high to fill it up with water, depending on how many cups of rice you're making. It's helpful to have the lines, but my rice cooker is so big that the lines start at three cups, which is way more than we eat at one sitting. "Why don't you just make one or two cups?" you may ask. Well, I've tried and the rice always comes out overcooked or undercooked. So, just to be on the safe side, I always make at least three cups of rice to ensure good rice. Which means I almost always have leftovers. And when there's leftover rice, what does any Asian make? Fried rice, of course.

I usually make a simple egg and green onion fried rice as a side dish, nothing fancy or complicated. I use a huge wok (which I think we also got as a wedding gift) just because it seems more authentic that way. With my old stove I always felt I didn't have enough fire power (aka BTUs) to properly cook fried rice, so I was eager to test out my new stove's largest burner, which has a pretty enormous flame.

I tried out a couple of different things this time around, wondering if it would add more flavor. Basically, this is a variation on my usual lazy person's fried rice recipe. Everyone has their own way of making fried rice -- the beauty of the dish is that it's adaptable and you can make it all kinds of ways with all kinds of ingredients and it turns out pretty well.

I think it goes without saying that you need to use leftover rice that's at least a day old (mine was barely a day old and I feel like I should've waited another day). Also, this is not necessarily a healthy dish. It's called fried rice for a reason; you'll use a lot of oil.

I don't have any specific measurements for the ingredients for this recipe -- just use as much as you want of each flavor.

Ingredients:
  • leftover rice (at least a day old) --> We eat Japanese short grain rice (i.e., "sticky" rice) that's half way between brown rice and white rice. Because it's a short grain rice it really needs at least two days in the fridge to lose its stickiness and crumble a bit. I don't think you have this problem with longer grain rice.
  • vegetable and sesame oil
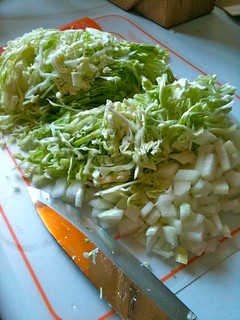
  • green onions, green parts finely chopped 
  • green onions, white parts chopped into 1~2 inch pieces
  • garlic cloves, smashed
  • ginger, sliced
  • eggs, beaten (I used three)
  • soy sauce
  • white pepper
  • MSG (totally optional)
finely chop garlic, ginger, green onions (separate the green and white parts)

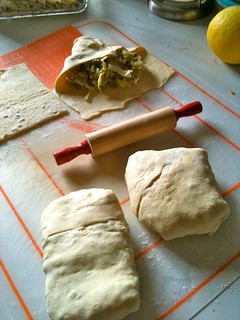
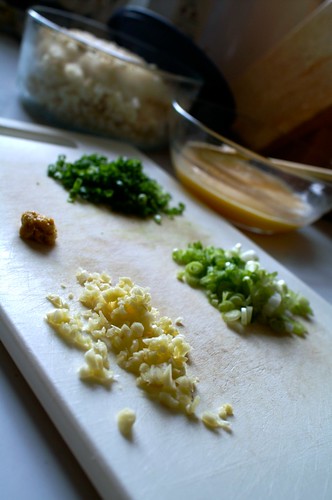
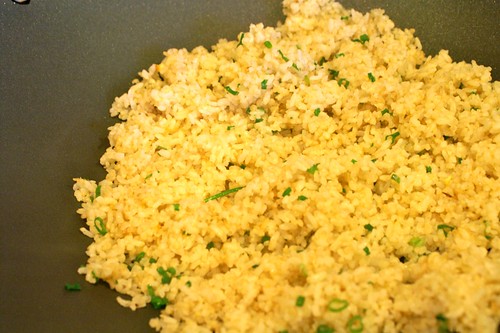
The aromatics on the ingredient list don't reflect what you see in the photo above. In hindsight, instead of mincing the aromatics, I should've kept them as fairly large pieces because I wanted them to enhance the flavor of the oil. It was hard to cook the minced aromatics in the oil and fish them out with a fine sieve before they burned.

under-cook the eggs 

Step 1: Whisk the eggs in a bowl while heating some oil in the wok (more oil than you would usually use to cook scrambled eggs). When the oil is hot, pour in the egg and cook until the edges start to slightly furl up but the middle is still wet and uncooked. Gently fold in the edges of the egg to the middle and give it one or two scrambles with a spatula before sliding the undercooked egg onto a plate. Set aside.

set aside the eggs and aromatics

Step 2: Heat a fair amount of vegetable oil (I probably used at least two tablespoons) with some sesame oil in the wok. Add the aromatics (white part of the green onions, garlic, ginger) and cook over medium heat until golden and, guess what? aromatic! Scoop them out before they burn. Since I used minced aromatics I set it aside to add back into the fried rice later. But if you're using larger chunks of aromatics you can toss it out or chop it up to use in your dish.

add the green onions

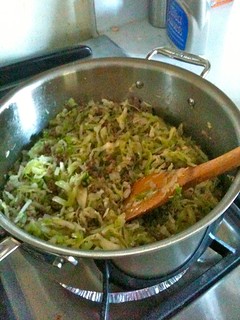
Step 3: Heat more vegetable oil in the wok; it should be hot. Break of up the rice before adding it to the wok. Make sure the oil gets evenly distributed on the rice and continue "frying." You should see steam coming up off the rice; you want it to dry out and the grains to separate. Once that happens, add the green part of the green onion and heat just a bit longer. Pour in one to two tablespoons of soy sauce around the side of the wok and toss the rice. Add the eggs and aromatics (if you want to) back in. Season with white pepper to taste. If you feel it needs more saltiness, add more soy sauce, salt, or -- gasp! -- MSG.

friend rice and garlic chicken 

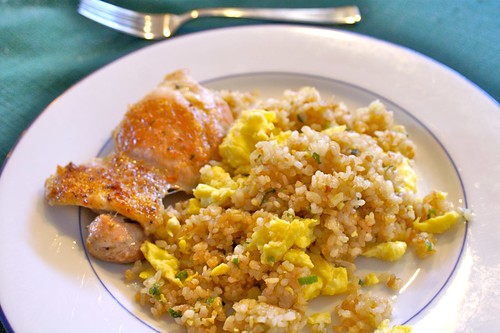
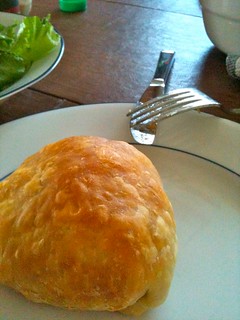
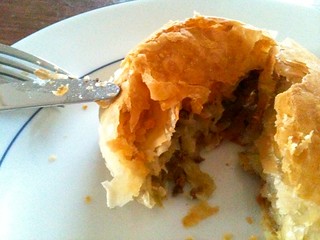
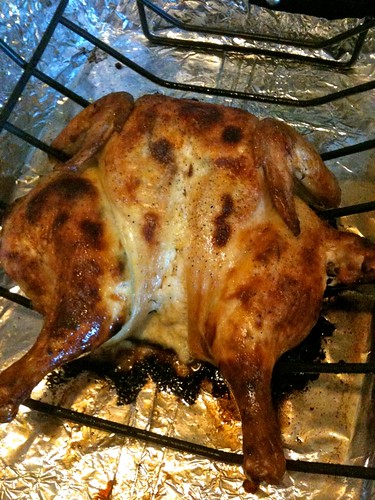
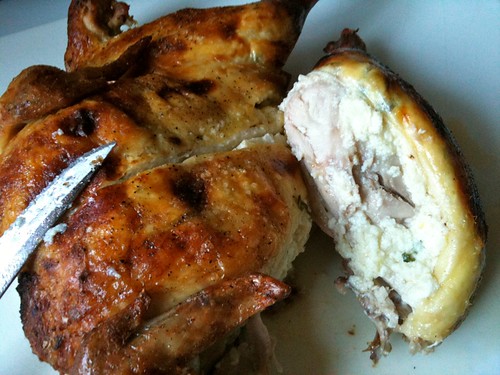
Step 4: Enjoy! We're going through our hot week here in Los Angeles so I was already sweating up a storm making the fried rice. I didn't have the energy to cook much more so I made the easiest chicken dish in the world: garlic chicken. Season skinless, boneless chicken thighs on both sides with pepper and garlic salt (we use Lawry's). Cook on medium high in some oil. That's it, and the kids love it!

8.11.2012

What I Made for Dinner :: Roasted Eggplant Salad

It's funny how your taste buds change over the years. I wonder how that works? How is that I used to dislike eggplant (among other vegetables) and now I love it? In the same vein, the kids don't like eggplant right now, but will they love this dish in 20 years? Hmm ...

[Speaking of taste buds, author Rebecca Stead incorporated taste buds in an unexpected way to show the turmoils of adolescent relationships in her new book Liar & Spy. Good stuff, people, good stuff.]

before roasting the eggplant 

For my grandmother-in-law's birthday dinner I was asked to bring a salad. This roasted eggplant salad with almonds and goat cheese was a hit at the last get-together I took it to. Since this batch had to feed 15 people I decided to add it to (2 bags of) mixed salad greens. (My preference was for the combo of the peppery-ness of arugula and the rich, deep creaminess of the roasted eggplant.)

The recipe calls for 2 ounces of goat cheese, but I used a whole 4 ounce container: half was incorporated into the eggplant mixture and the other half was sprinkled amongst the greens. I didn't add salad dressing to the greens because the eggplant and extra cheese acts as the dressing.

I, of course, forgot to take a picture of the finished product, but I received compliments on it so I think everyone liked it. It's a perfect hearty meatless meal for summer evenings. Granted, having to use the oven will heat up your house, but that's when you take your eggplant salad outdoors to your patio to enjoy! :)

8.02.2012

What I Made for Dinner :: Spatchcocked Ricotta Chicken + Roasted Mustard Potatoes

Since it's summer I'm getting back into semi-homemaker mode, which means I'm cooking (a bit) more and cleaning (a very tiny bit) more. All of those Pinterest food pins I collected over the last few months are finally getting tested.

spatchcocked ricotta chicken

Tonight I made spatchcocked ricotta chicken and roasted mustard potatoes. I had leftover ricotta cheese from making lasagna last week and I didn't want to waste it. I browsed Pinterest to see what ricotta recipes are floating around the internet and I pinned this chicken recipe and a cheese cake recipe (which I'll try the next time I have leftover ricotta).

Spatchcock means to butterfly a chicken. Enter my new kitchen shears I got from my mother-in-law. Some people are grossed out by working with a raw, whole chicken but I rather enjoy it. It may sound weird, but I feel like I'm getting to know the food better by touching it all over. (There are lots of videos online if you want to see how to spatchcock a chicken.)

Spatchcocked Ricotta Chicken from the Kitchn (apartment therapy):

Ingredients:
  • 1 whole chicken, at least 3 1/2 pounds
  • 1 1/2 cups ricotta cheese
  • 1/4 cup freshly grated Parmesan cheese
  • 1 large egg, beaten
  • 1/2 cup panko bread crumbs
  • 1/2 cup finely chopped basil
  • 2 cloves garlic, minced
  • 1/2 teaspoon freshly grated lemon zest
  • salt and freshly ground black pepper, to taste
  • Olive oil
Instructions:
  1. Preheat the oven to 400°F.
  2. Remove the innards from the chicken and reserve them for another use. Wash and pat dry the chicken.
  3. Spatchcock (aka butterfly) the chicken using poultry shears or a sharp chef's knife: first remove the backbone, slicing or cutting it along each side all the way down to the tail end. Splay the chicken open with the skin side up on a flat surface. Place the heel of your hands, one on top of the other, over the middle of the chicken. Press down to flatten the chicken. You may hear the breast-bone crack.
  4. Run your fingers under the skin at the neck opening to loosen the skin around the breasts, reaching as far down as the legs if possible.
  5. In a small bowl, combine the ricotta, parmesan, egg, bread crumbs, basil, garlic, lemon zest. Season with salt and pepper.
  6. Using a spoon, carefully stuff the cheese mixture into the chicken between the skin and the meat, starting at the breasts. Coax the mixture into an even layer by pressing and pushing it from the outside, above the skin. Place the chicken on a rack, or several 1/2-inch-thick slices of onion, in a roasting pan, skin side up. Rub it with about a tablespoon olive oil and season generously with salt and pepper.
  7. Roast for an hour or until the juices run clear from the thigh. To test for doneness with a thermometer, check the breast meat for an internal temperature of 165°F. Transfer the chicken to a cutting surface and let stand for 5-10 minutes.
  8. To serve, divide the chicken into quarters, splitting the two breasts into four pieces if desired.
spatchcocked ricotta chicken

When you cut the chicken you can see there's a layer of ricotta cheese, which also paired rather nicely with the potatoes:

Roasted Mustard Potatoes from The High Heeled Hostess:

Ingredients:
  • 5 cups potatoes, cut into 3/4 inch cubes
  • 3 tablespoons extra-virgin olive oil, plus more for greasing pan
  • 1/2 cup Dijon mustard (regular or whole-grain)
  • 2 tablespoons butter, melted
  • 2 tablespoons fresh lemon juice
  • 1 teaspoon lemon zest, grated
  • 3 garlic cloves, minced
  • 1 tablespoon dried oregano
  • 2 tablespoons grated Parmesan cheese
  • 1 teaspoon sea or kosher salt and freshly ground black pepper
Instructions: 
  1. Preheat oven to 425 degrees F. Lightly grease a large, rimmed, thin baking sheet with olive oil.
  2. Whisk mustard, olive oil, butter, lemon juice, zest garlic, oregano, parmesan, salt and a few turns or pinches of black pepper. Add cubed potatoes and toss well.
  3. Spread out on baking sheet and bake until crusty and golden brown - they can take anywhere from 30 minutes to an hour depending on how well done you like them and how big you cut your potatoes, check every 10 minutes starting around the 30 minute mark.
mustard roasted potatoes 

Both are fairly easy recipes, although prepping the chicken is a bit time-consuming. The chicken came out moist and tender and the skin crisped up nicely. I probably had 1/4" layer of the ricotta mixture under the skin but the flavor wasn't overpowering; the nice thing about ricotta is that it's pretty mild and it melds well with the lemon, basil, and garlic (I always use one more clove of garlic than what the recipe calls for, so in this case I used 3 cloves, which I grated with a microplane grater). Although the dish was good, I'm not sure I would go out of my way to make it, meaning I would make it if I had leftover ricotta cheese but I wouldn't buy the ricotta just to make this. Maybe it's just too much work to prepare on a weeknight (especially once I go back to work)?

Here are some additional notes:
  • Using the oven at 400 degrees+ in summer is not a good idea -- it makes the kitchen too hot!
  • I didn't use all of the ricotta mixture, which would've been fine except that I thought I was going to use it all so I stuck the spatula back into the bowl after it touched the raw chicken. I ended up having to throw out a good amount of the mixture.
  • I roasted the potatoes for about 30 minutes and they were great (Rupert said he could eat them all day long), but they could've used more time to crisp up.